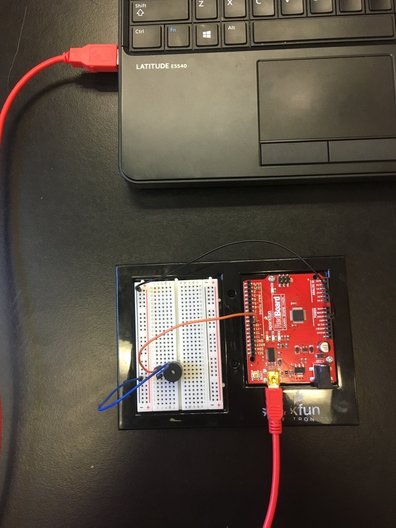
For this project, we were told to make something interesting happen using the Arduino program and circuit board. My group decided to make a buzzer play the classic song, Twinkle, Twinkle, Little Star. Not only did we make this final project, but we also did generic electricity and circuit board experiments. For the electricity experiments, we used batteries, wires, switches, and light bulbs to study the characteristics of electricity. We also closely examined how electricity moved around and how it acts in series and in parallel. In the circuit board experiments, the purpose was to get familiar with the circuit boards themselves, and the Arduino programming. These guided experiments worked with us to get us functionally coding using the program, and enable us to do our final project with the program.
|
|
Code:
/*
SparkFun Inventor's Kit
Example sketch 11
BUZZER
Use the buzzer to play a song!
The buzzer in your Inventor's Kit is an electromechanical
component you can use to make noise. Inside the buzzer is a
coil of wire and a small magnet. When current flows through
the coil, it becomes magnetized and pulls towards the magnet,
creating a tiny "click". When you do this thousands of times
per second, you create tones.
The Arduino has a built-in command called tone() which clicks
the buzzer at a certain frequency. This sketch knows the
frequencies of the common notes, allowing you to create songs.
We're never going to let you down!
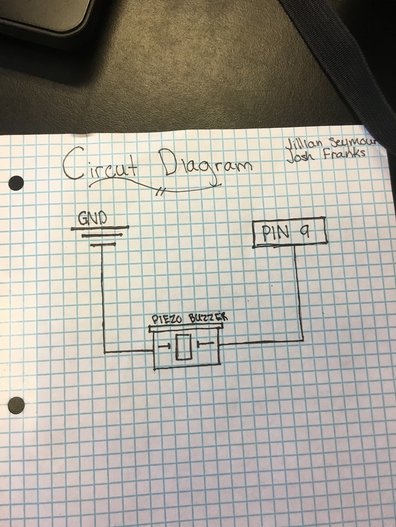
Hardware connections:
The buzzer has two pins. One is positive and one is negative.
The postitive pin is marked by a "+" symbol on both the top
and bottom of the buzzer.
Connect the positive pin to Arduino digital pin 9.
(Note that this must be a PWM pin.)
Connect the negative pin to GND.
Tip: if the buzzer doesn't fit into the breadboard easily,
try rotating it slightly to fit into diagonal holes.
This sketch was written by SparkFun Electronics,
with lots of help from the Arduino community.
(This sketch was originally developed by D. Cuartielles for K3)
This code is completely free for any use.
Visit http://learn.sparkfun.com/products/2 for SIK information.
Visit http://www.arduino.cc to learn about the Arduino.
Version 2.0 6/2012 MDG
*/
/*
This sketch uses the buzzer to play songs.
The Arduino's tone() command will play notes of a given frequency.
We'll provide a function that takes in note characters (a-g),
and returns the corresponding frequency from this table:
note frequency
c 262 Hz
d 294 Hz
e 330 Hz
f 349 Hz
g 392 Hz
a 440 Hz
b 494 Hz
C 523 Hz
D 588 Hz
For more information, see http://arduino.cc/en/Tutorial/Tone
*/
const int buzzerPin = 9;
// We'll set up an array with the notes we want to play
// change these values to make different songs!
// Length must equal the total number of notes and spaces
const int songLength = 48;
// Notes is an array of text characters corresponding to the notes
// in your song. A space represents a rest (no tone)
char notes[] = "ffCCDDC ttCCaaf DDCCaag DDCCaag ffCCDDC DDCCaaf"; // a space represents a rest
// Beats is an array of values for each note and rest.
// A "1" represents a quarter-note, 2 a half-note, etc.
// Don't forget that the rests (spaces) need a length as well.
int beats[] = {2,2,2,2,2,2,4,1,2,2,2,2,2,2,4,1,2,2,2,2,2,2,4,1,2,2,2,2,2,2,4,1,2,2,2,2,2,2,4,1,2,2,2,2,2,2,4, };
// The tempo is how fast to play the song.
// To make the song play faster, decrease this value.
int tempo = 250;
void setup()
{
pinMode(buzzerPin, OUTPUT);
}
void loop()
{
int i, duration;
for (i = 0; i < songLength; i++) // step through the song arrays
{
duration = beats[i] * tempo; // length of note/rest in ms
if (notes[i] == ' ') // is this a rest?
{
delay(duration); // then pause for a moment
}
else // otherwise, play the note
{
tone(buzzerPin, frequency(notes[i]), duration);
delay(duration); // wait for tone to finish
}
delay(tempo/10); // brief pause between notes
}
// We only want to play the song once, so we'll pause forever:
while(true){}
// If you'd like your song to play over and over,
// remove the above statement
}
int frequency(char note)
{
// This function takes a note character (a-g), and returns the
// corresponding frequency in Hz for the tone() function.
int i;
const int numNotes = 10; // number of notes we're storing
// The following arrays hold the note characters and their
// corresponding frequencies. The last "C" note is uppercase
// to separate it from the first lowercase "c". If you want to
// add more notes, you'll need to use unique characters.
// For the "char" (character) type, we put single characters
// in single quotes.
char names[] = { 'c', 'd', 'e', 'f', 'g', 'a', 'b', 'C','t','D'};
int frequencies[] = {262, 294, 330, 349, 392, 440, 494, 523, 560, 588};
// Now we'll search through the letters in the array, and if
// we find it, we'll return the frequency for that note.
for (i = 0; i < numNotes; i++) // Step through the notes
{
if (names[i] == note) // Is this the one?
{
return(frequencies[i]); // Yes! Return the frequency
}
}
return(0); // We looked through everything and didn't find it,
// but we still need to return a value, so return 0.
}
_______________________________________________________________________________________________________________________________
This is the code we created to control our diagram. Each little symbol above represents a command for the circuit board. All together, it commands the buzzer sitting on the circuit board to produce certain sounds at a certain frequency.
Circuit: A loop of conductive material from positive to negative sides of a power source. Requires resistance to avoid shorting out
Resistance: Measure of how much current is slowed/ how many obstacles in a circuit. Measured in Ohms
Current: The flow of electricity through a circuit. Found using the equation I(Current)=V(Voltage)/R(Resistance). Measured in Amps
Voltage: Potential energy drop across a component of a circuit. Found using the equation: V=I(current)R(resistance). Measured in Volts
coding: assigning a code to something for the purposes of identification or classification
breadboards: boards used for making an experimental model of an electric circuit
Power: supply (a device) with mechanical or electrical energy
Reflection:
For this project, my knowledge of coding greatly increased. As far as peaks go, I feel that one of mine was my work ethic. I feel that I accomplished what I wanted to be done by staying on task and focusing, which I have struggled with in the past. Another peak for me this project was my leadership. I felt that this project I stepped up more than I had in prior projects. On the other hand, empathy is something I could have improved on. I could have improved on this by making sure to include my group members better. I could have also improved on my leadership for the original electricity experiments. For those, I took too much of a back-seat position and did not do as much work as I should have.
